
Overview: What are we talking about?
The Appointment Module is for time-based services that are not Daycare or Boarding such as grooming, training, walks, and transport. This module includes an appointment calendar with time slots that you can use to schedule appointments. You can assign different users to different services and you can set up each user's availability for these services.
*Please Note: The Appointment Module can be used either in conjunction with the Boarding and Daycare Modules or as a stand-alone module.
This article will cover:
- Setting up the Appointment Module
- Scheduling Users' Availability Blocks
- Customizing the Appointment Module
- Creating Appointments
- Submitting Appointment Requests via the Online Booker
- Accepting and Managing Appointment Requests
- How to Update Appointment Standard Rates
Let's Get Started with this Video Overview!
How to set up your Appointment Module
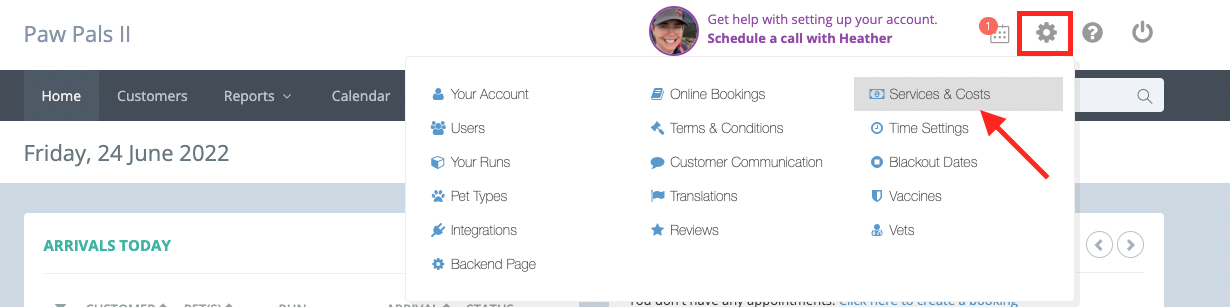
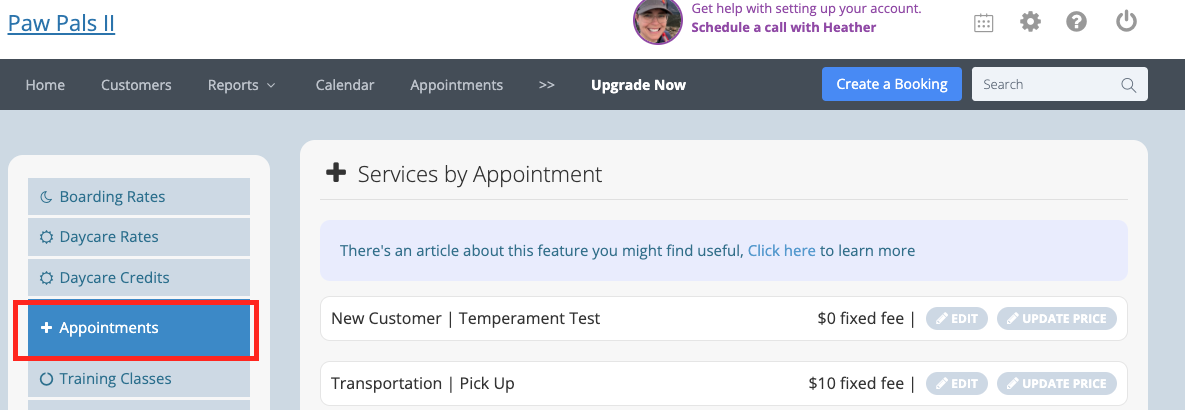
Navigate to Account Settings » Services & Costs » Appointments
There will be a few Default Services set up that you can Edit or Delete. To add a new Appointment Service Type, click the blue "Add a new appointment" button. From there, you will set the name and cost. You can also choose whether or not to show the appointment type on the Online Booker by using the checkbox at the bottom of the screen.
Scheduling Users' Appointment Availability
You can create individual appointment calendars for all your sub-users. This is done by editing/adding the User From Settings > Users and selecting "Create Individual Appointment Calendar."

Customizing the Appointment Module
Defining Appointment Types for Users
You can define which appointment types each of your users that have an availability calendar can be booked for. This is helpful to book specific specialists and services, and stop overbooking.
This can be managed in two places. The first is in Account Settings » Services and Costs » Appointments. Under each appointment type, there is a drop-down to select which of your users that have the “Create Individual Appointment Calendar” setting enabled on their profile are available for this type of appointment.

The second is in the Admin Section » Users under each user. If the “Create Individual Appointment Calendar” setting is enabled for their account, you can select which services that they perform from this page.

Once this is configured, the system is going to look for availability for users that take this type of appointment when providing times to the customer on the online booker, and to determine if there is availability on a date.
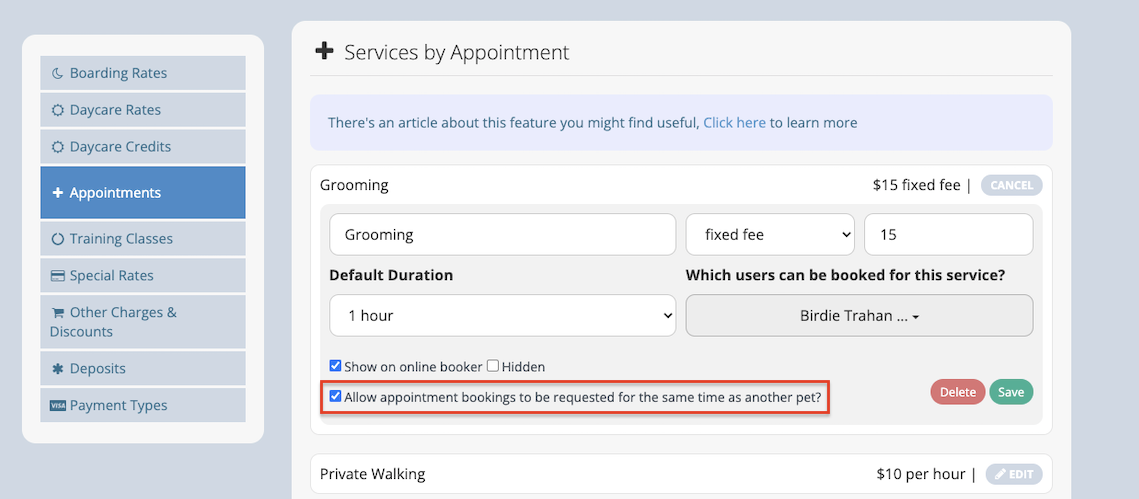
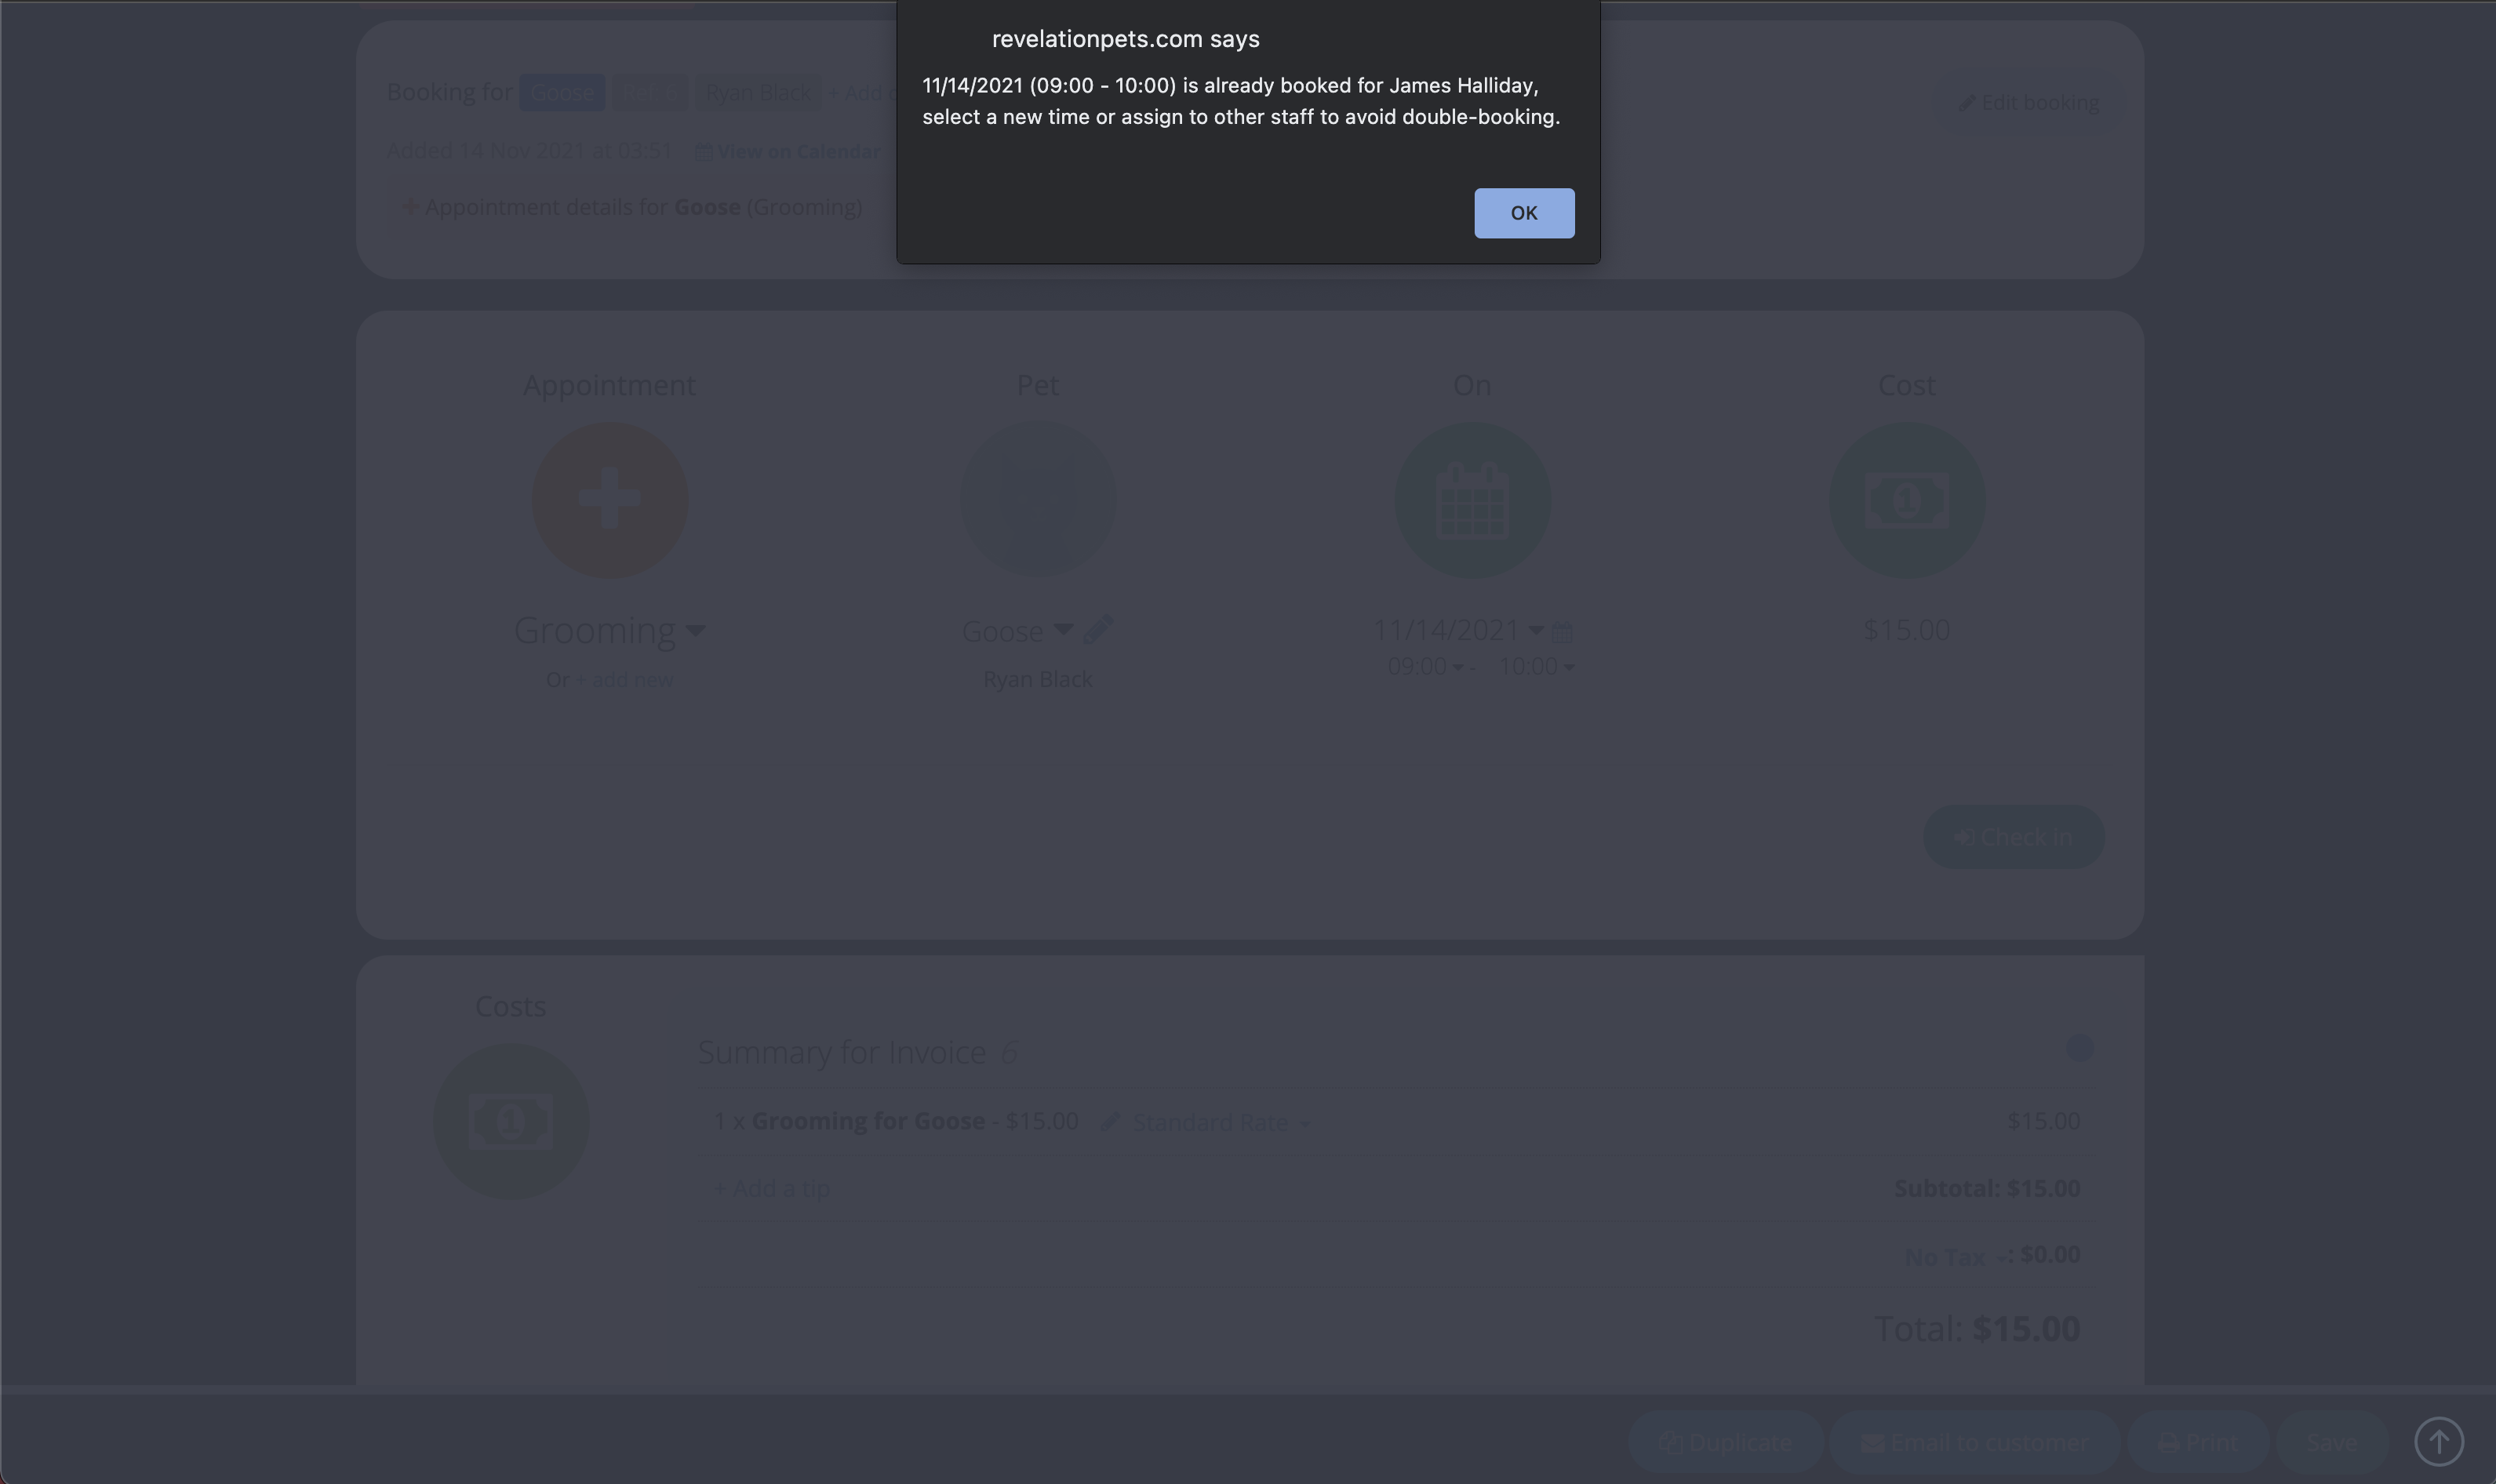
Enabling Overlapping Appointment Alerts
To prevent overlapping appointments, you have the ability to configure a pop-up alert when you are creating an appointment for a pet at the same time another appointment is booked. In order to enable this feature, you’ll head to Account Settings » Services and Costs » Appointments and disable the setting called “Allow appointment bookings to be requested for the same time as another pet?” under each appointment type where you do not wish to allow overlapping appointments.
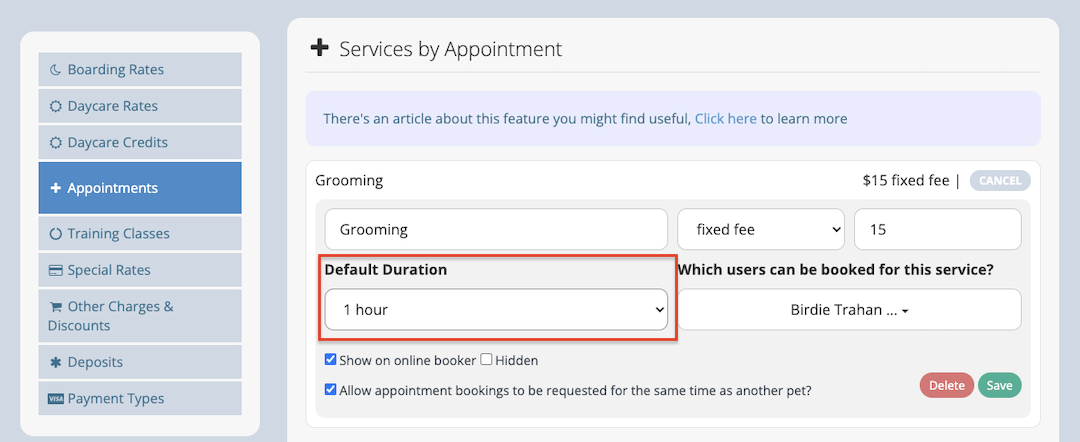
Setting Default Duration
To prevent errors or overbooking when making appointments, you can set a default duration for each appointment type that you offer. In order to enable this feature, you’ll head to Account Settings » Services and Costs » Appointments and enter the “Default Duration” (in minutes) for each of your appointment types. Once set, the system will automatically use this duration to set the end time of the appointment once an employee (or the pet parent) sets the start time.
Show Time Blocks in the Online Booker (Recommended)
To show appointment time blocks in the Online Booker and create the best experience for your pet parents, navigate to Account Settings » Online Bookings and enable the “Show time blocks in the Appointment module” setting.

The system will use a default duration of 1 hour when this setting is enabled, meaning that pet parents can book appointments on the hour. To change the default, the business should go to Admin » Services and Costs » Appointments and edit each appointment type to set a default duration as outlined above.
The system will use the set duration combined with the time windows found on the Admin » Time Settings page to split out the day into the appointment times.
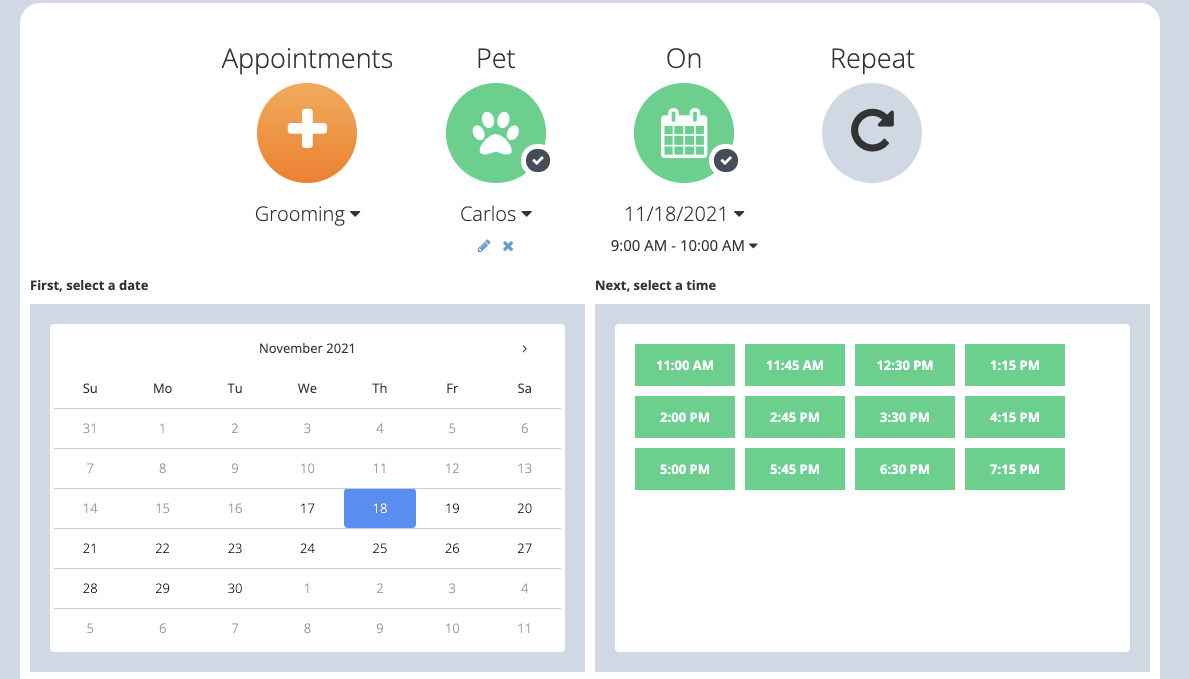
When the pet owner goes to the Appointments section of the Online Booker, they will see the ability to first select a date, then to select from an appointment time. If the “Allow appointment bookings to be requested for the same time as another pet?” setting is disabled for the appointment type they created, the pet parent will only see available appointments on the online booker. They will not be able to request the appointment at the same time as another pet is already booked.
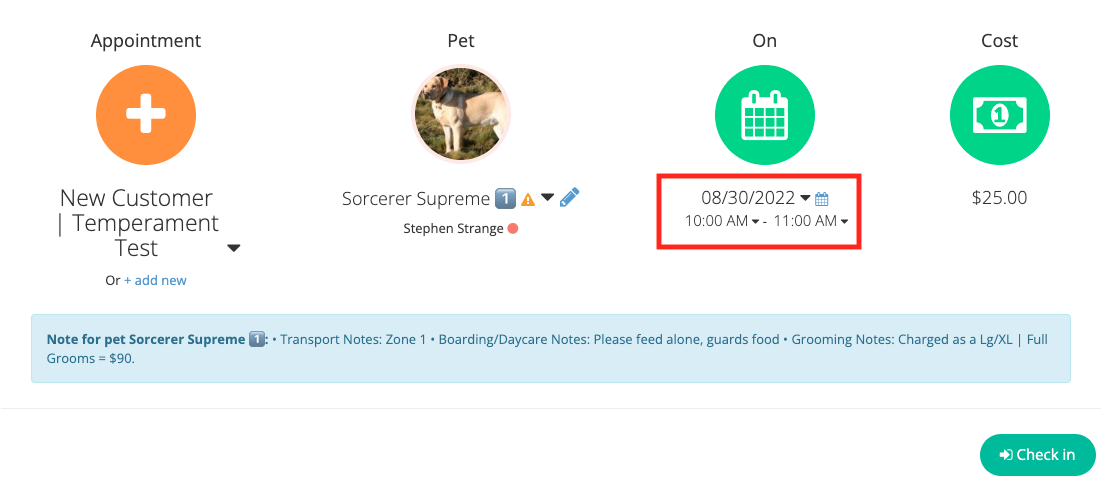
Creating Appointments from the Business Side
You can create Appointments wherever you can create Bookings in Revelation Pets. This includes the Booking Page and Owner/Animal Profile, as well as the Appointments Calendar. Appointments can be added onto Boarding or Daycare Bookings, or, can be Appointment-only bookings.
If you do not assign the Appointment to any specific user, it will stay assigned to the "Anyone" User.
Creating Appointments via the Online Booker
Pet Parents will see Appointments on the Online Booker just as you see them on the Booking Page.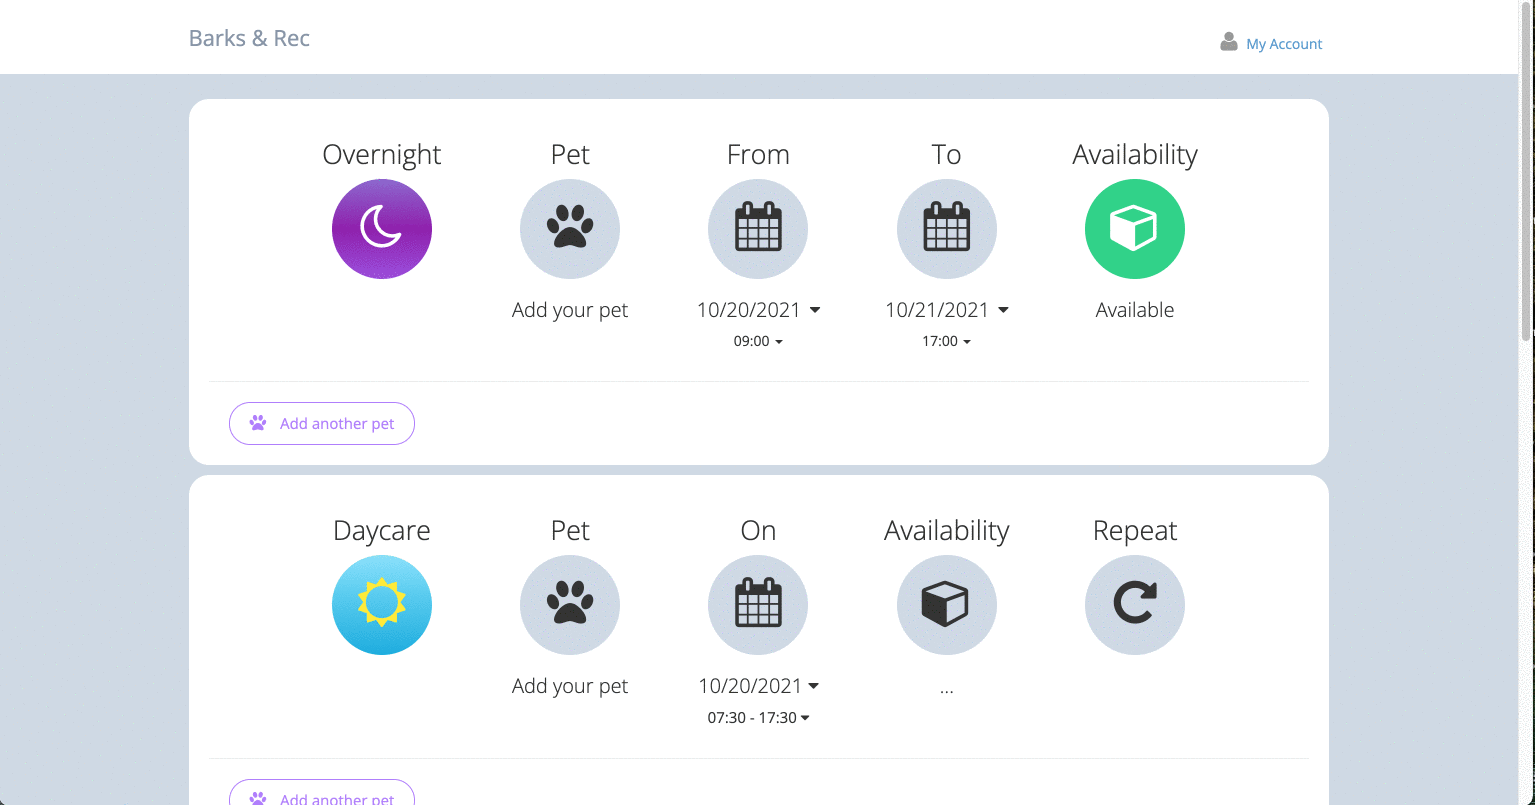
If the setting to “Show time blocks in the Appointment module” is enabled, pet parents will see the ability to first select a date, then to select from an appointment time. If the “Allow appointment bookings to be requested for the same time as another pet?” setting is disabled for the appointment type they created, the pet parent will only see available appointments on the online booker. They will not be able to request the appointment at the same time as another pet is already booked.
You can also add a 1-time user-scheduled appointment/service to a booking on the booker module by clicking on the +Add New button under the appointment module portion of the booking you are creating/editing.
Please note: This 1-time appointment will not be saved to your list of appointments types (Account Settings >> Services & Costs >> Appointments).
Accepting and Managing Appointment Requests
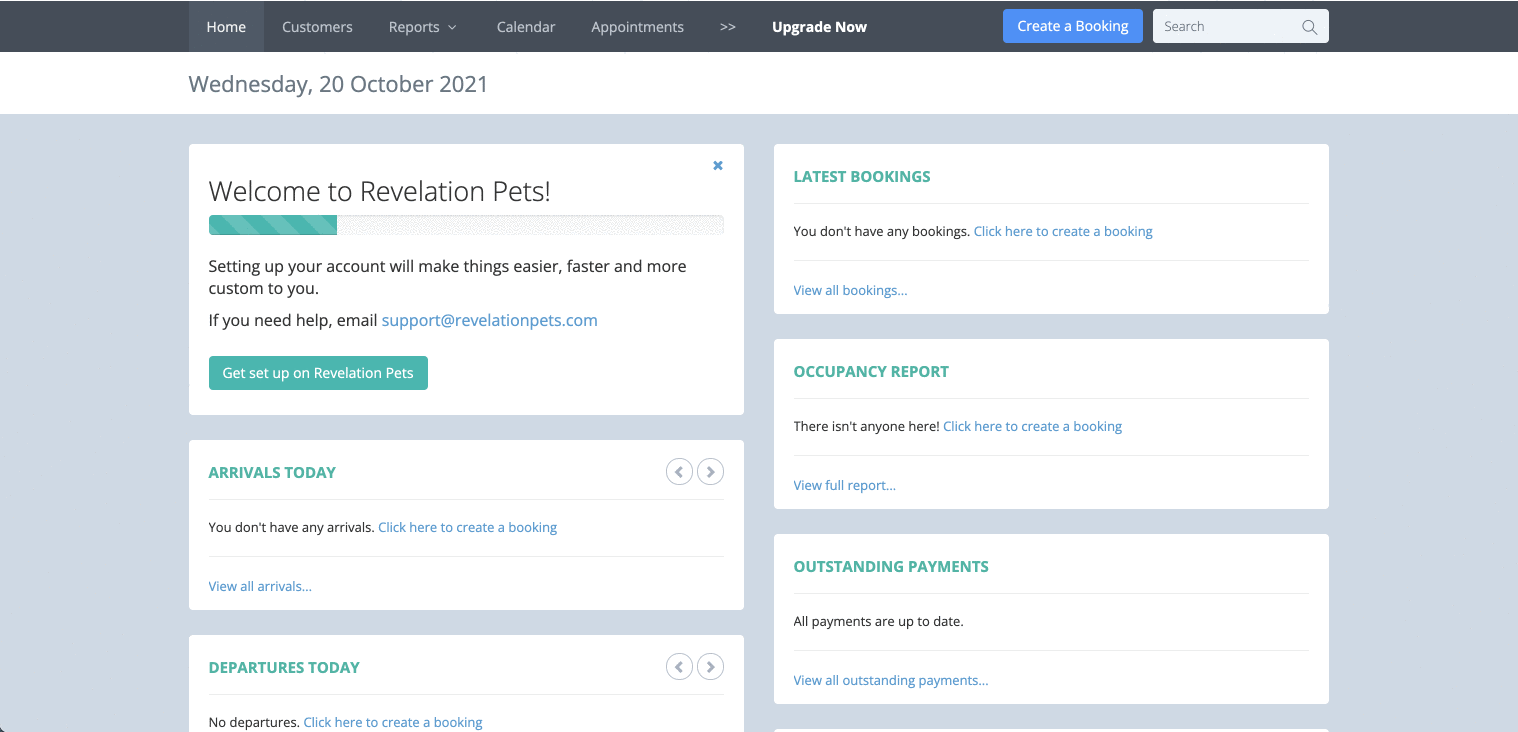
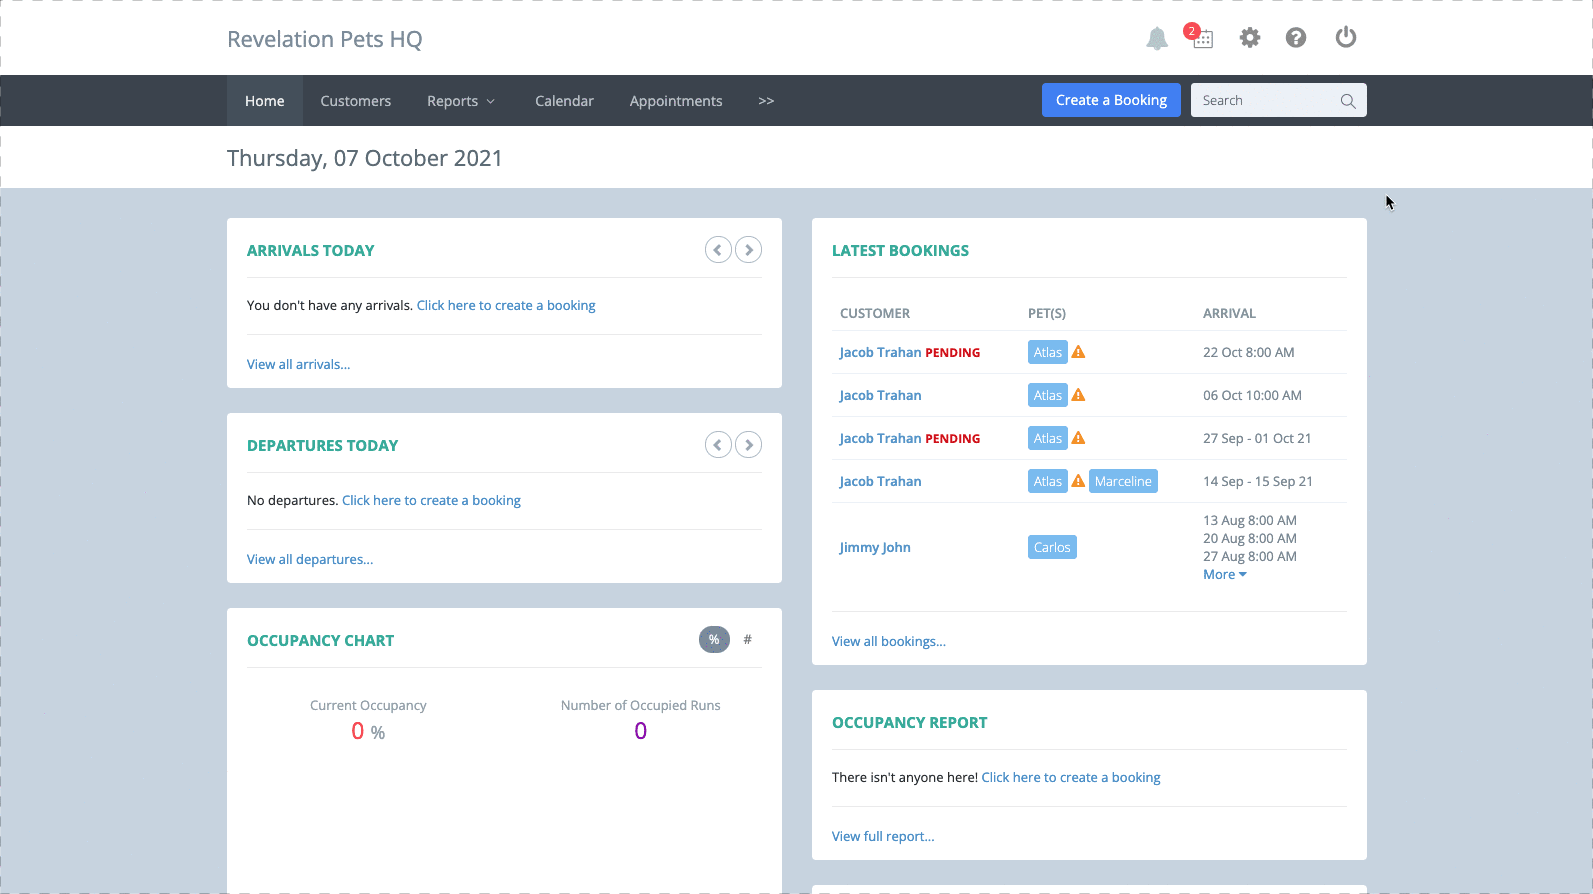
Appointment Requests will come into Revelation Pets like any other Booking Request. When customers submit booking requests via the Online Booker, you will then see a notification on your home page, alerting you to this new booking.

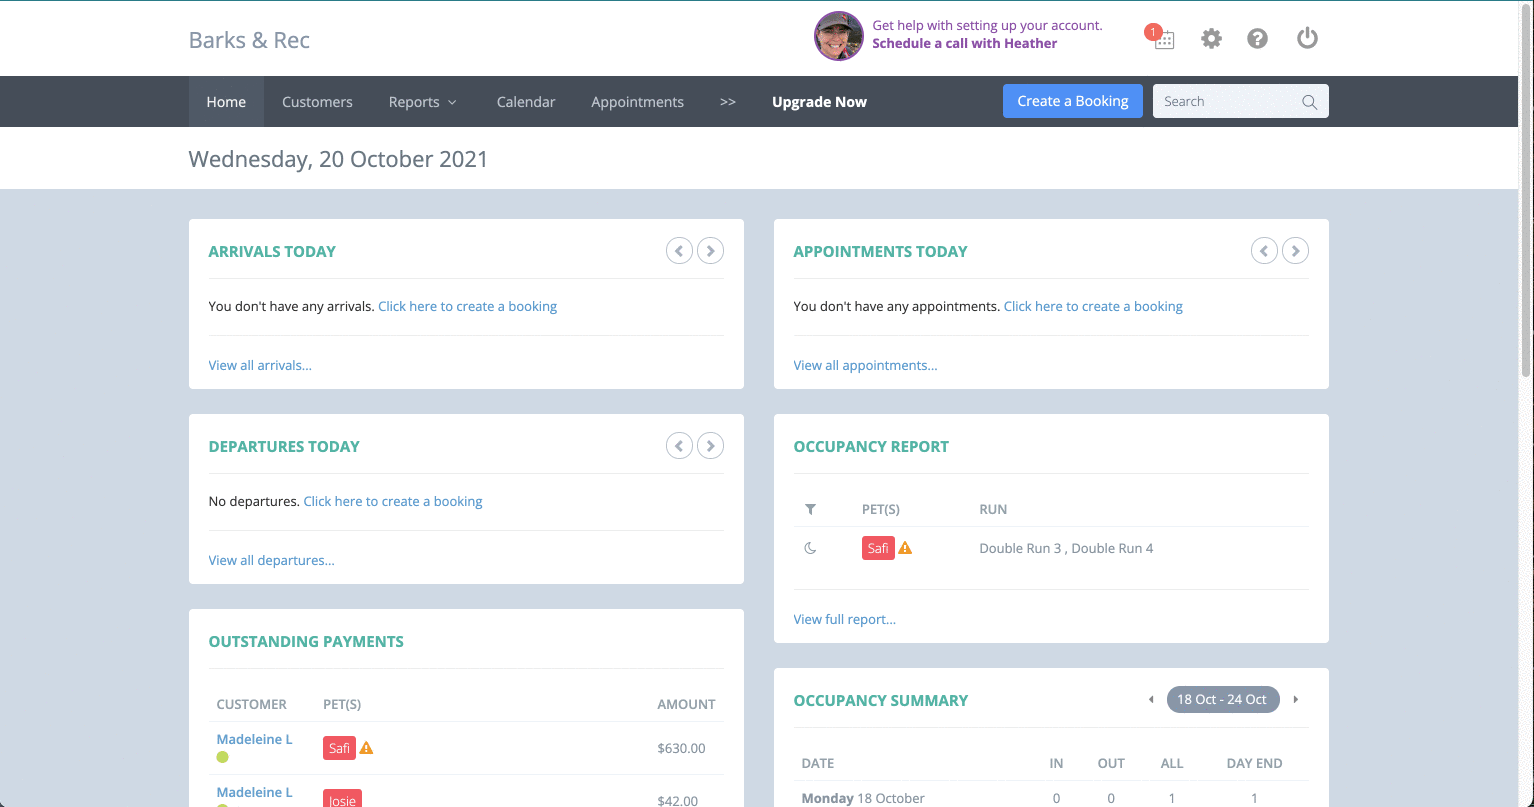
You will also be alerted by email to any requests submitted. From the alert, open the booking and either Accept or Decline the booking or place the pet on the Wait List.
Declining or Cancelling Requests
When declining a booking request, you can enter a decline reason. This will allow you to keep track of why bookings were declined, and you can also choose to include the decline reason in the decline email to the pet parent by adding the [booking decline reason] variable to the email template from Account Settings » Online Bookings » Translation: Online Booking Email » Decline Email.
Here is an example of the decline email that the customer would receive:
There is an option on the Booking page for appointments to preview the appointment on the Appointment Calendar. To use this, simply click on the Calendar icon that will appear to the right of the appointment date (as well as repeating appointment dates). This will overlay the Appointment Calendar, and allow you to fine tune the appointment by updating the start or end time as well as move it to a different user.
You can drag and drop in order to reschedule from the Appointment Calendar. This allows you to move an appointment to a different user or time on the originally scheduled day, or to a different day in the same calendar week when on the week view for a single user. To use this feature, simply drag and drop the appointment to a new appointment time.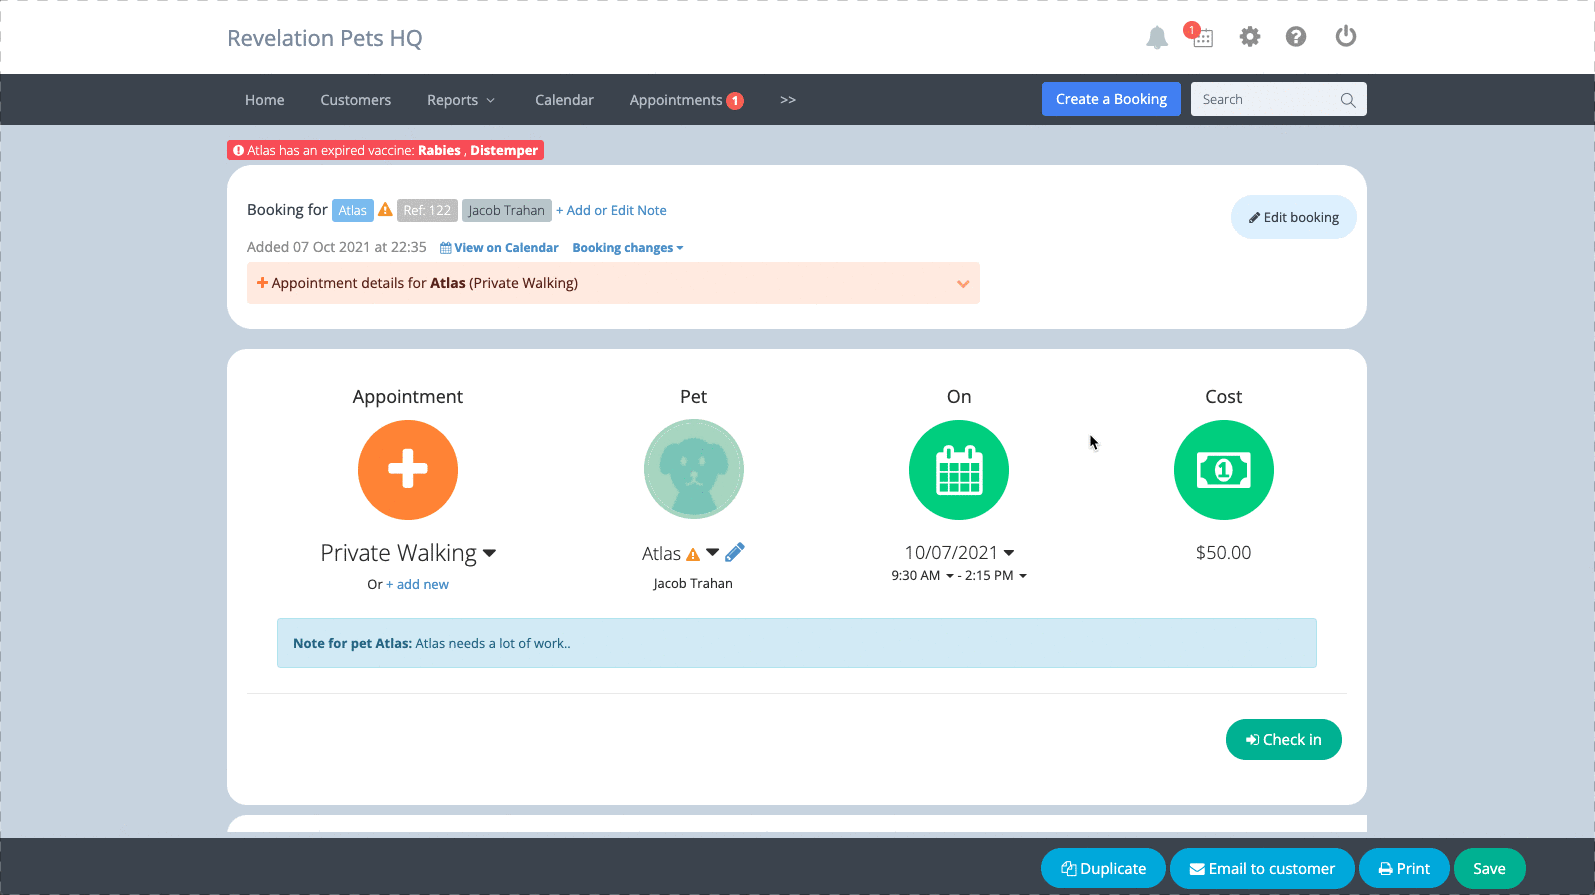
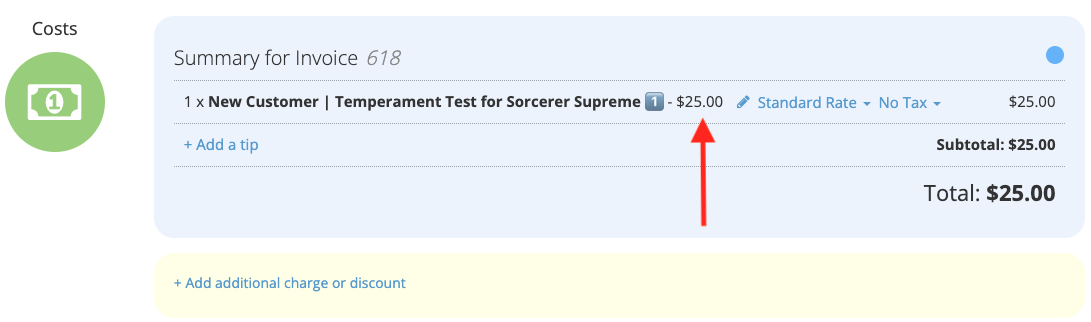
How to Update Appointment Standard Rates
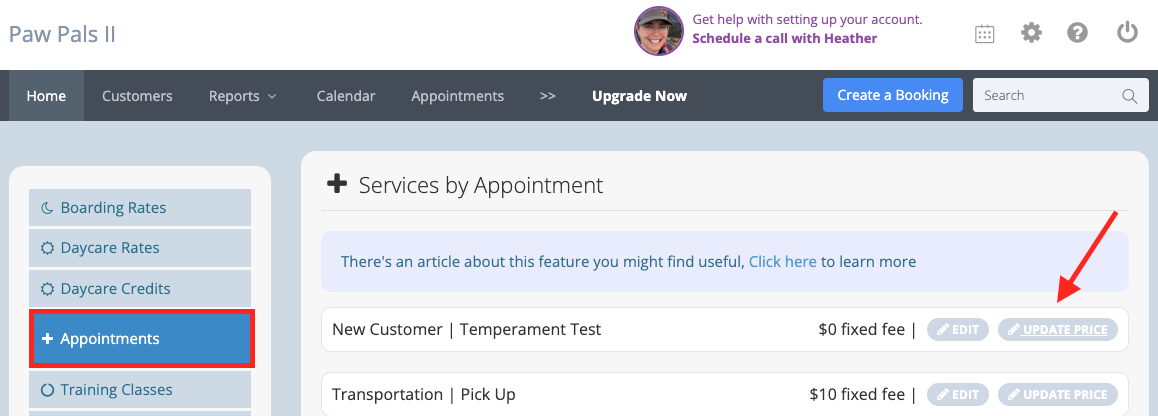
Navigate to Account Settings » Services & Costs » Appointments
Click "Update Price" for the appointment type you are going to update.
Click "Add a new rate."
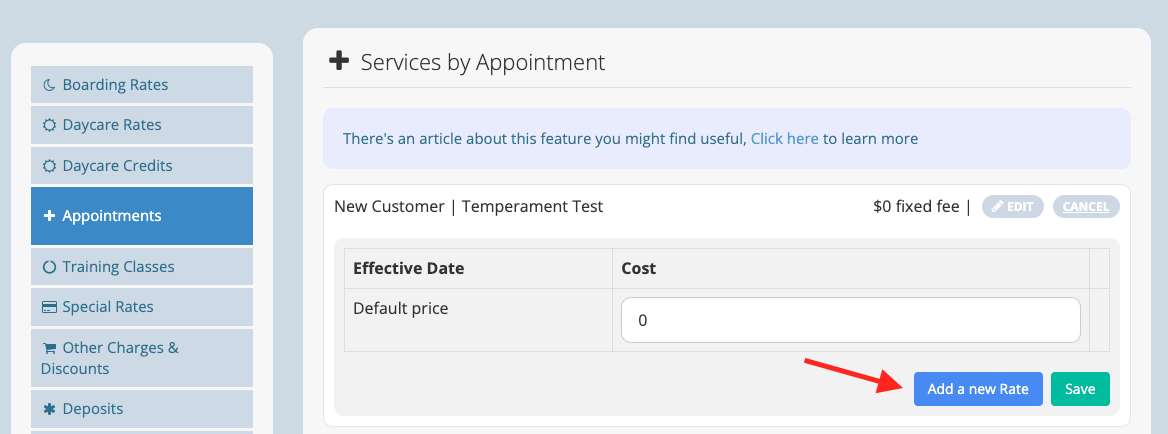
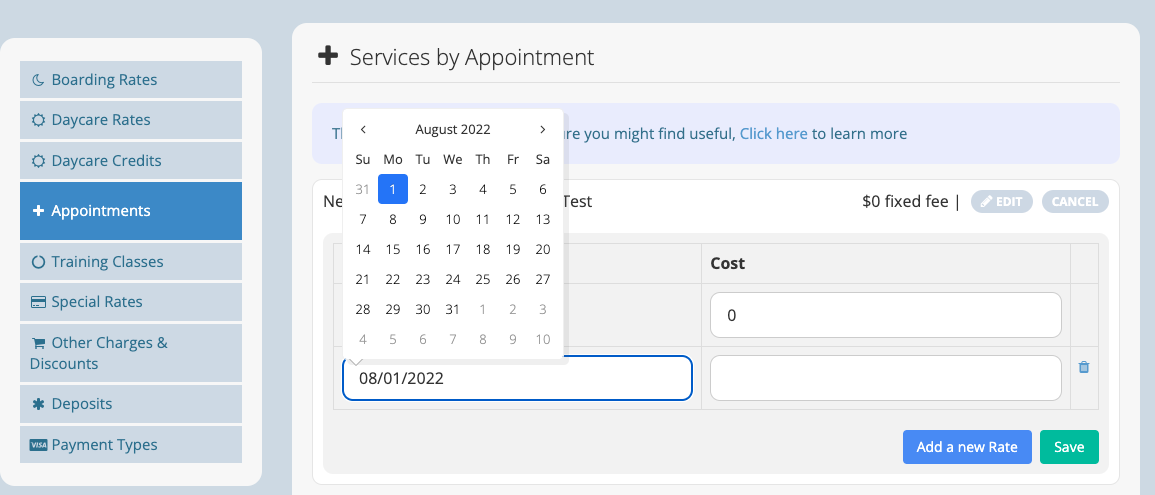
Add the effective date of the new rate and update the cost field.
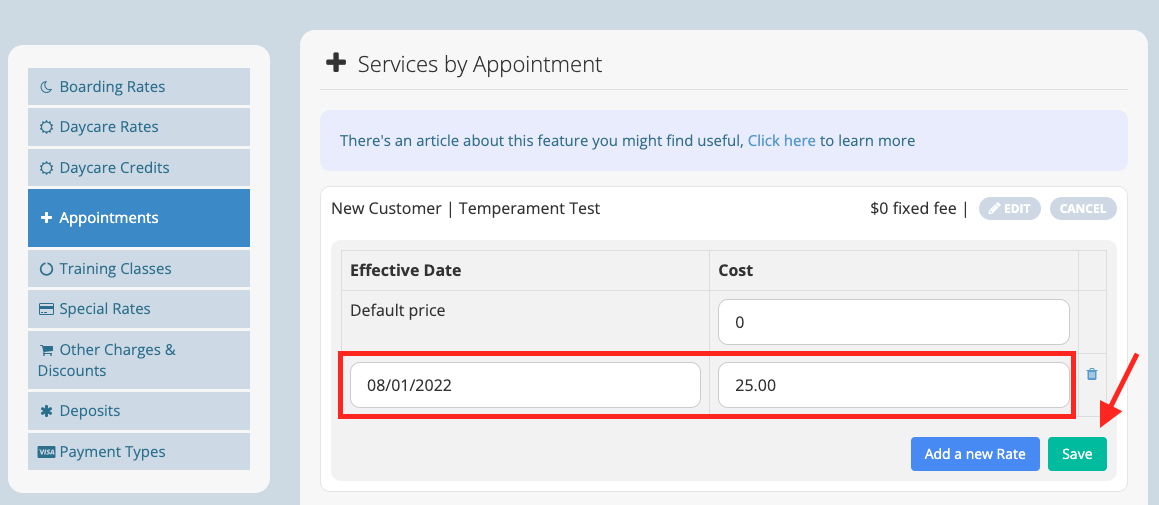
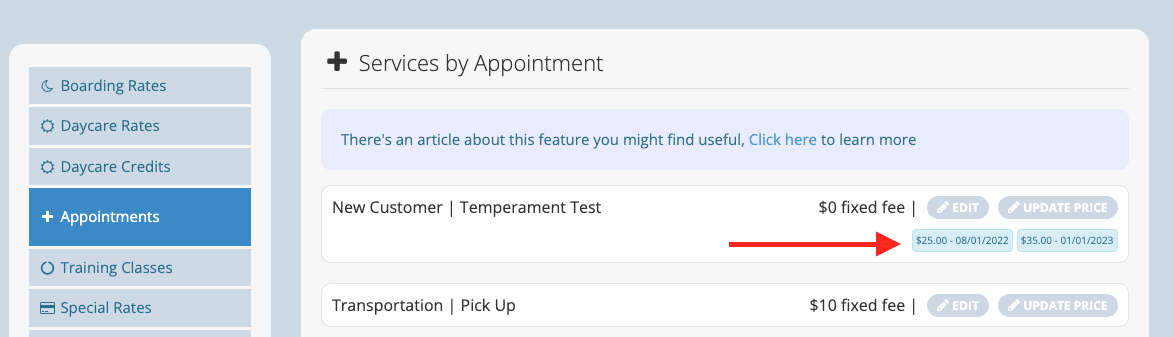
Now your appointment type will display with your new rate and effective date visible.
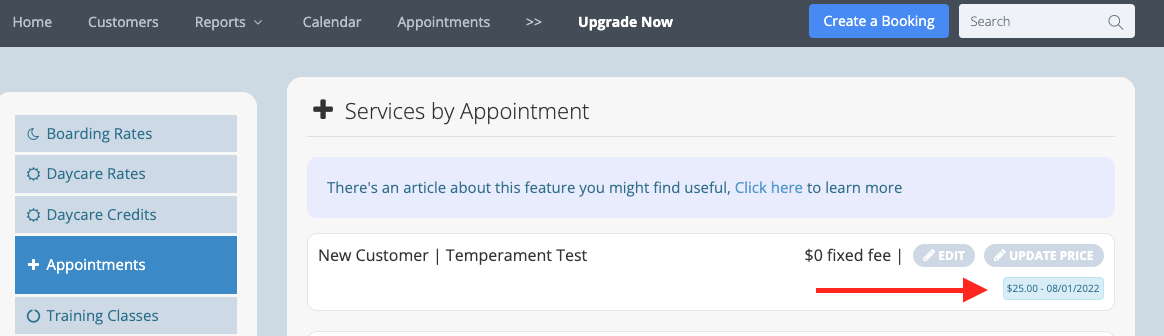
You can add multiple rate adjustments per appointment type at once, following the steps noted above.

Please note:
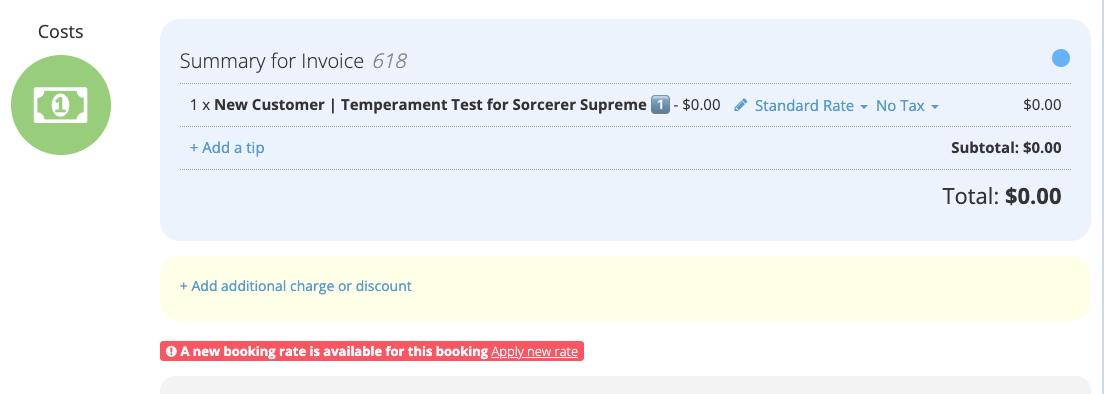
1) The effective date recognizes the arrival date of the booking. All bookings with an arrival date after the effective date, will be updated to the new rate. All bookings with an arrival date before the effective date, will remain at the old rate.
2) Bookings with recurring dates will respect the first arrival date on the booking. Therefore, if the first arrival date is before the effective date, then all dates included on the booking will remain at the old rate.
3) If an existing booking's arrival date is changed to a date starting after an effective date, the booking will display an alert giving the User the option to update the rate if applicable.
Whooo hoo! You have successfully updated your appointment standard rate with an effective date!
New bookings entered into the system after the effective date, will update with your new rate automatically.
Comments
0 comments
Please sign in to leave a comment.